Creating Invoices
To create an invoice, open the estimate and click the Proposals & Invoice tab. At the bottom of that page, click the Invoice Page button.

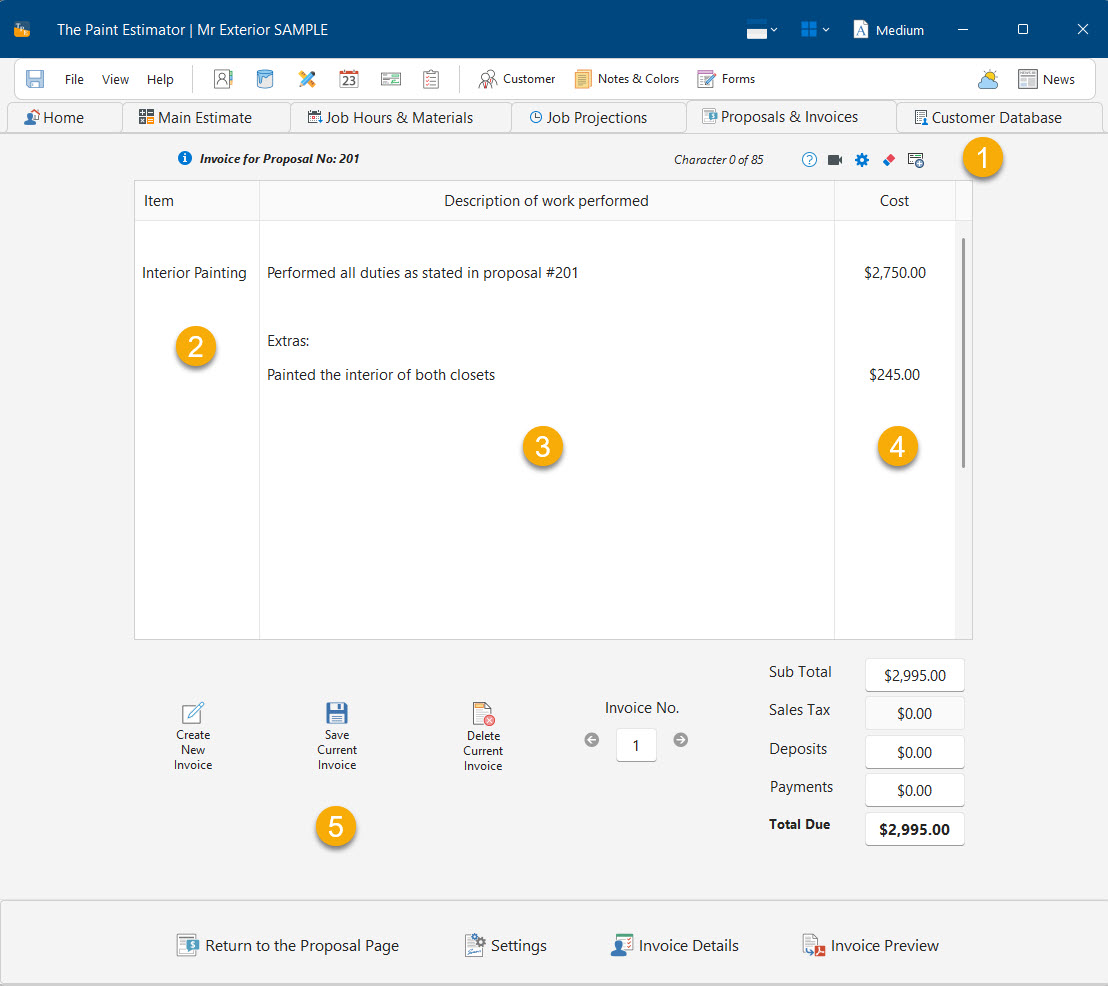
This opens the Invoice page.
How the invoice works
The invoice is laid out as a grid without visible borders. This design allows you to click anywhere under Description of work to be performed and start typing—there is no requirement to begin on the first line.
In most cases, invoices do not need to be complex. Since the customer already has the proposal with detailed scope, many users keep invoices short and simple.
If additional work was performed, you can list those items below the main description. Some users also attach the proposal when delivering the invoice.
Invoice page sections
- Menu options — Includes Help, video demos, and invoice settings. You can adjust the line length, which controls how many characters fit on a line before wrapping. The default is 85 characters, but this may vary depending on your display DPI. The eraser button resets all invoices for the job.
- Item column — Used when pricing is itemized. If pricing is not itemized, you can simply enter the project name.
- Description area — Where you type the description of work performed.
- Cost column — Enter the cost for each listed item.
- Save Current Invoice — Saves the active invoice.
NEW in version 2.0.1.0 is the ability to add the Total Due to the expense register. This can save time from having to enter these amounts manually

You can create multiple invoices for a single job. This is especially useful when collecting progress payments.
Invoice Details
To view the customer address and additional invoice settings, click the Invoice Details button.

Make any necessary changes, then close the panel.
Previewing and exporting invoices
When you are ready, click the Preview Invoice button at the bottom of the page.
From the preview screen, you can:
- Save the invoice as a PDF
- Export to Microsoft Word
- Export to OpenOffice
- Print the invoice
If you have any questions, please contact support@thepaintestimator.com .